Update the CoSchedule WordPress Plugin
When a new version of the CoSchedule plugin comes out, you can use the automatic updater through WordPress to update it to the newest version that we offer. If you're unable to do this, you can also manually update it.
 2. Click to update the plugin.
You will automatically be prompted in WordPress on how to update the plugin. Once the update has finished, WordPress will indicate that the plugin update was successful and that the plugin also reactivated successfully.
2. Click to update the plugin.
You will automatically be prompted in WordPress on how to update the plugin. Once the update has finished, WordPress will indicate that the plugin update was successful and that the plugin also reactivated successfully.
 Back To Top
 You can deactivate the plugin from within your WordPress dashboard, in the Plugin section. If you have multisite in place, you will deactivate for the entire network. You will not lose any of your associated messages.
2. Uninstall the plugin.
Once you have your plugin deactivated, uninstall it completely.
You can uninstall the plugin from within your WordPress Dashboard, in the Plugin section. If you have multisite in place, you will uninstall for the entire network. You will not lose any of your associated messages as long as you later connect the plugin using the same API key as you had been using previously.
3. Download the plugin.
We encourage you to install the latest version of the plugin through the WordPress plugin gallery, as it will simplify your update process from this point forward. However, if you want to continue the update process manually, you will need to download the plugin as a ZIP file and save to your computer.
4. Upload the ZIP file to WordPress.
Login to your WordPress account, and navigate to the Plugins > Add New section on the left sidebar of your WordPress Dashboard.
You can deactivate the plugin from within your WordPress dashboard, in the Plugin section. If you have multisite in place, you will deactivate for the entire network. You will not lose any of your associated messages.
2. Uninstall the plugin.
Once you have your plugin deactivated, uninstall it completely.
You can uninstall the plugin from within your WordPress Dashboard, in the Plugin section. If you have multisite in place, you will uninstall for the entire network. You will not lose any of your associated messages as long as you later connect the plugin using the same API key as you had been using previously.
3. Download the plugin.
We encourage you to install the latest version of the plugin through the WordPress plugin gallery, as it will simplify your update process from this point forward. However, if you want to continue the update process manually, you will need to download the plugin as a ZIP file and save to your computer.
4. Upload the ZIP file to WordPress.
Login to your WordPress account, and navigate to the Plugins > Add New section on the left sidebar of your WordPress Dashboard.
 You will have the option to upload a plugin manually and select the file. You can also drag-and-drop the ZIP file onto the page.
Automatic Update
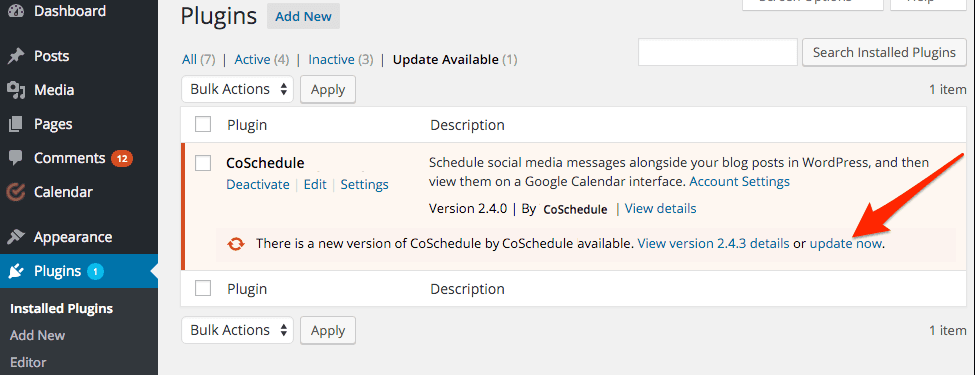
1. Login to your WordPress Dashboard. Navigate to the Plugins page in your WordPress Dashboard, which will allow you to automatically update the plugin within WordPress.
2. Click to update the plugin.
You will automatically be prompted in WordPress on how to update the plugin. Once the update has finished, WordPress will indicate that the plugin update was successful and that the plugin also reactivated successfully.
Back To Top
Manual Update
1. Deactivate the plugin.
You can deactivate the plugin from within your WordPress dashboard, in the Plugin section. If you have multisite in place, you will deactivate for the entire network. You will not lose any of your associated messages.
2. Uninstall the plugin.
Once you have your plugin deactivated, uninstall it completely.
You can uninstall the plugin from within your WordPress Dashboard, in the Plugin section. If you have multisite in place, you will uninstall for the entire network. You will not lose any of your associated messages as long as you later connect the plugin using the same API key as you had been using previously.
3. Download the plugin.
We encourage you to install the latest version of the plugin through the WordPress plugin gallery, as it will simplify your update process from this point forward. However, if you want to continue the update process manually, you will need to download the plugin as a ZIP file and save to your computer.
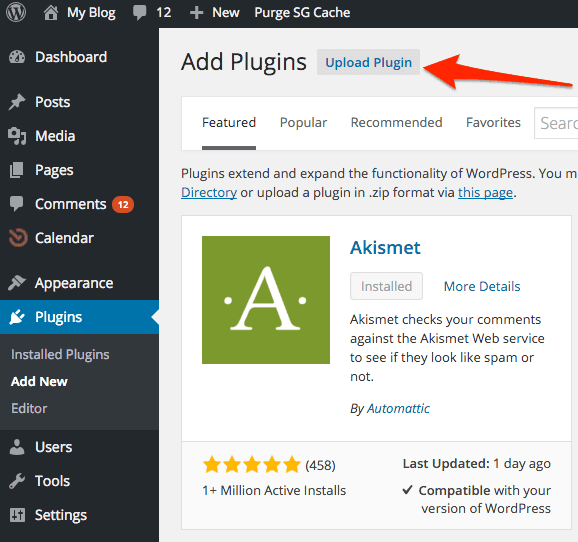
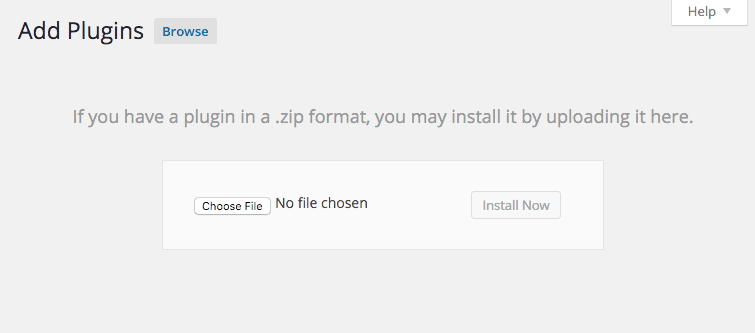
4. Upload the ZIP file to WordPress.
Login to your WordPress account, and navigate to the Plugins > Add New section on the left sidebar of your WordPress Dashboard.
You will have the option to upload a plugin manually and select the file. You can also drag-and-drop the ZIP file onto the page.
Once this is completed, activate the plugin in the Plugins > Installed Plugins page.
Back To Top