Upload Social Messages from a CSV File (Spreadsheet)
Schedule up to 365 social messages all at one time with Bulk Social Upload. With bulk social upload, you can upload a CSV file of prepared rows and then schedule them with a few clicks.
In the upload process, you will able to preview and edit each message - giving you the opportunity to add images and schedule messages to multiple social profiles. Bulk scheduling will alert you to any errors found in specific messages, so you can quickly fix the issues or delete a message.
 Note: We recommend using Google Sheets when working with CSV files. Excel can cause errors by converting years into YY format instead of the required YYYY when it exports to CSV.
Back To Top
Note: We recommend using Google Sheets when working with CSV files. Excel can cause errors by converting years into YY format instead of the required YYYY when it exports to CSV.
Back To Top
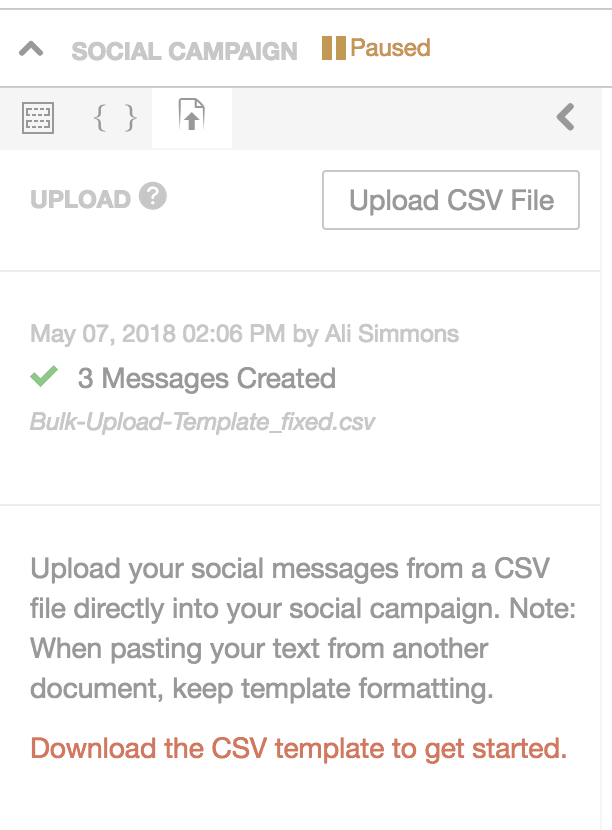
 to open the bulk upload pane. To upload your bulk upload file, click Upload CSV File. The bulk social upload pane will display a log of every bulk social upload that has occurred in the specific social campaign.
 Next, select the social profile(s) for your messages. Once selected, click Preview Messages to begin editing your uploaded entries.
Back To Top
Next, select the social profile(s) for your messages. Once selected, click Preview Messages to begin editing your uploaded entries.
Back To Top
 .
When finished editing and solving all errors, click Create Messages.
.
When finished editing and solving all errors, click Create Messages.
 Bulk upload will attempt to import all entries into your social campaign. When bulk upload is finished processing your messages, click Go to Social Campaign to view all social messages in your campaign.
Back To Top
Bulk upload will attempt to import all entries into your social campaign. When bulk upload is finished processing your messages, click Go to Social Campaign to view all social messages in your campaign.
Back To Top
Note: Bulk Social Upload is available in Social Calendar, Content Calendar, and Marketing Suite.
Prepare Bulk Social Upload File
To eliminate any errors, download our sample template. You can fill in up to 365 rows of the CSV upload file. Note: When pasting your text from another document to the template, please format it to match the style in the template.Note: You cannot bulk upload images in the CSV file. Instead, add images while editing uploaded messages.
Formatting Rules
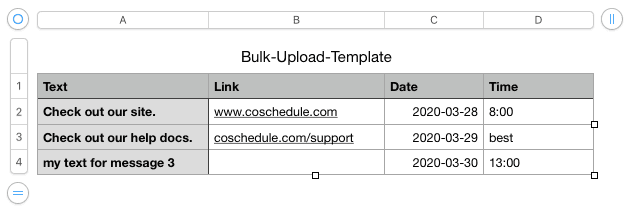
When uploading your CSV to the Bulk Social Uploader, CoSchedule will look for four columns. Text, Link, Date, and Time.- Text: This will be the text in the body of the social message. Social helpers can be added to files that are being uploaded to an existing campaign.
- Link: Add a URL to any social message. Leaving this blank will default the message to a Text-type message.
- Date: Must be in the YYYY-MM-DD format. Any other date format will result in a date not being automatically added to the social message.
- Time: It is in the 24hr format and must be formatted as HH:MM. (03:00 = 3:00am and 13:00 = 1:00pm) You can also type in 'best' to schedule as Best Time Scheduling.
Example CSV File
Note: We recommend using Google Sheets when working with CSV files. Excel can cause errors by converting years into YY format instead of the required YYYY when it exports to CSV.
Back To Top
Upload Bulk Social Upload File
From Calendar
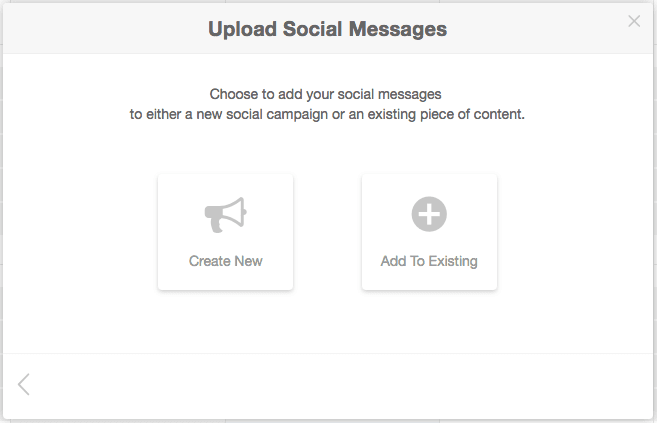
Click + on any date to begin then select More Options. Then click Bulk Social Upload.
Inside Existing Social Campaign
On the left-hand side of an existing social campaign, click
Next, select the social profile(s) for your messages. Once selected, click Preview Messages to begin editing your uploaded entries.
Back To Top
Edit Uploaded Messages
Editing messages inside the bulk social upload composer will be the same as editing any message on your calendar. Select a message on the left to edit it on the right. If the bulk social upload composer detects any errors in your uploaded messages, those messages will be listed with a red banner explaining the issue. Your messages cannot be created until all issues are fixed. When errors are fixed, the red banners will disappear. To delete an entry, click
Bulk upload will attempt to import all entries into your social campaign. When bulk upload is finished processing your messages, click Go to Social Campaign to view all social messages in your campaign.
Back To Top