HubSpot with CoSchedule
Connect your HubSpot account with CoSchedule and sync your email marketing, pages, and blog posts into one place. In addition, you can collaborate and execute on all those moving pieces in a tool designed specifically for marketers.
 Back To Top
 Back To Top
 Next, choose your URL, if you're managing multiple sites, then the Page template you're wanting to work with. Once finished, you will see the HubSpot Page editor added to your project.
You can change the Page Title and Scheduled Time in CoSchedule. To edit further, click Edit in HubSpot.
Next, choose your URL, if you're managing multiple sites, then the Page template you're wanting to work with. Once finished, you will see the HubSpot Page editor added to your project.
You can change the Page Title and Scheduled Time in CoSchedule. To edit further, click Edit in HubSpot.
 Back To Top
- Connecting CoSchedule to HubSpot
- Create a New HubSpot Post
- Create a New HubSpot Page
- View HubSpot Email Campaigns On Your Calendar
Note: Hubspot integration is only available in Social Calendar, Content Calendar, and Marketing Suite.
To integrate you need a HubSpot plan that includes Blog, Email Marketing, and Landing pages. The person who authorizes the integration with CoSchedule must also have authorization/access to those three features in HubSpot.
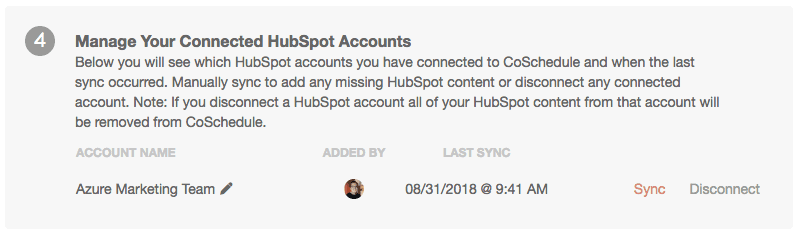
Connecting CoSchedule to HubSpot
1. Go to your calendar’s Settings > Integrations page. 2. Locate HubSpot and click Enable. Log in to your HubSpot account then click Connect to HubSpot. Once connected, your HubSpot account will appear at the bottom. Edit what name is displayed on your CoSchedule calendar or Sync your HubSpot content at any time.
Back To Top
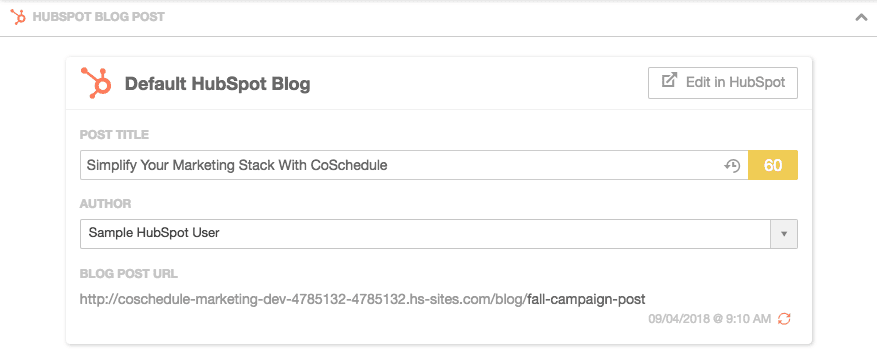
Create a New HubSpot Post
After connecting HubSpot to CoSchedule, CoSchedule will sync all of your HubSpot Posts to the calendar. To create a new HubSpot blog post or page, click + on the date you want to schedule a new post. Select the HubSpot Blog Post type. Enter your title, add labels, owner, etc. Click the Create button when you are ready. Next, choose your URL, if you're managing multiple sites, then the Page template you're wanting to work with. Once finished, you will see the HubSpot Page editor added to your project. You can change the Post Title, Author, and Scheduled Time in CoSchedule. To edit further, click Edit in HubSpot.
Back To Top
Create a New HubSpot Page
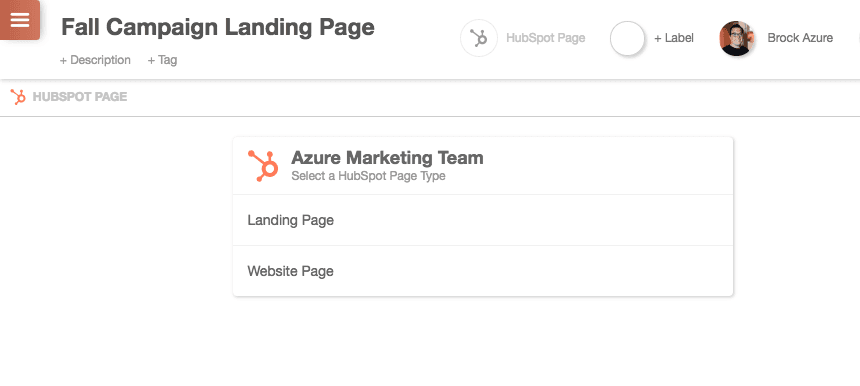
After connecting HubSpot to CoSchedule, CoSchedule will sync all of your HubSpot Pages to the calendar. To create a new HubSpot blog post or page, click + on the date you want to schedule a new post. Select the HubSpot Blog Post type. Enter your title, add labels, owner, etc. Click the Create button when you are ready. Next, choose the type of page you're wanting to create. You can create a Landing Page or Website Page inside of CoSchedule.
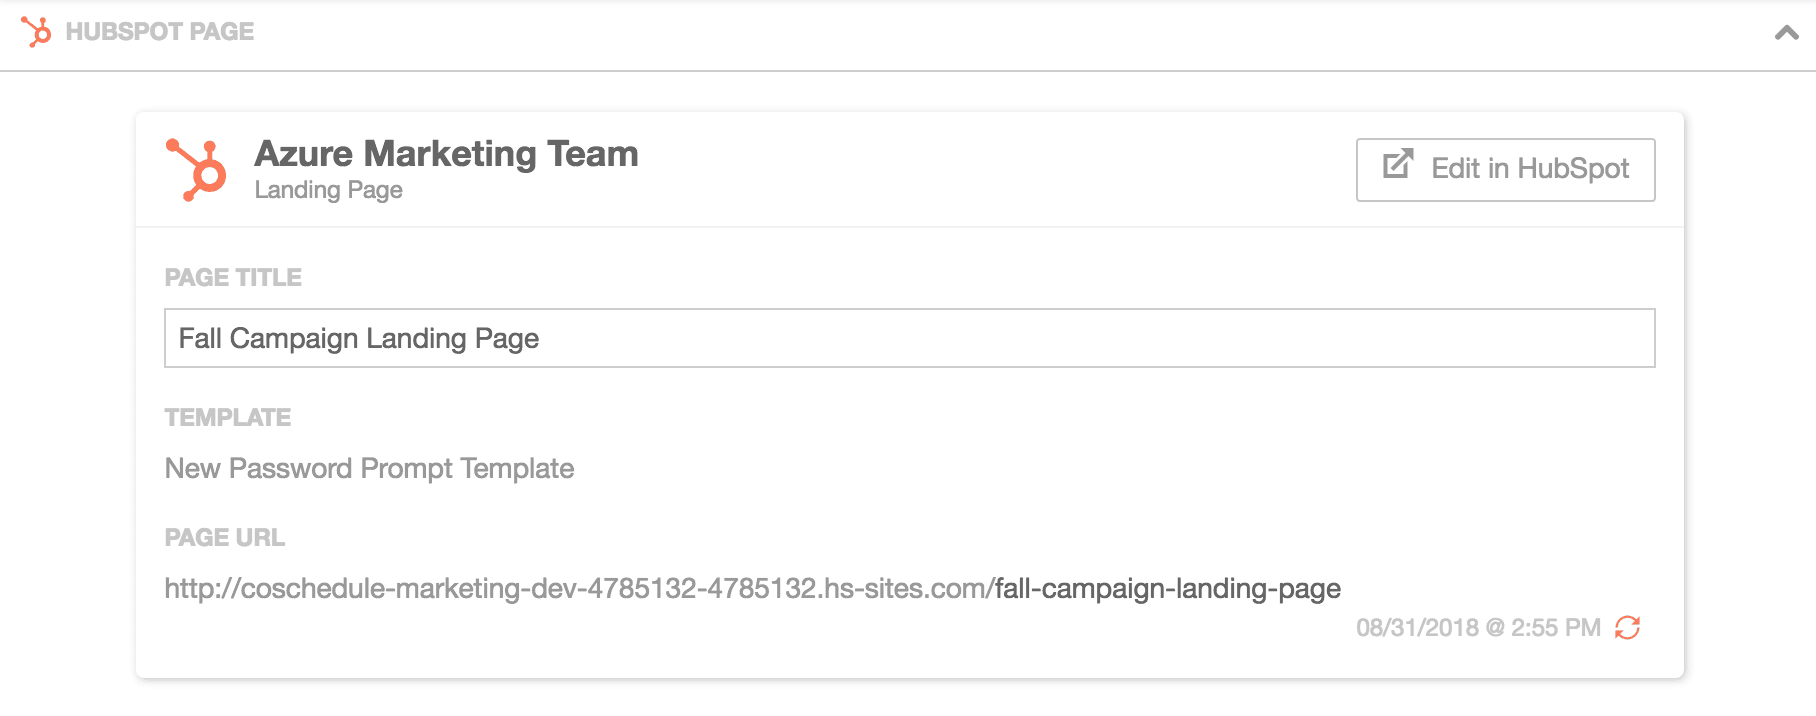
Next, choose your URL, if you're managing multiple sites, then the Page template you're wanting to work with. Once finished, you will see the HubSpot Page editor added to your project.
You can change the Page Title and Scheduled Time in CoSchedule. To edit further, click Edit in HubSpot.
Back To Top
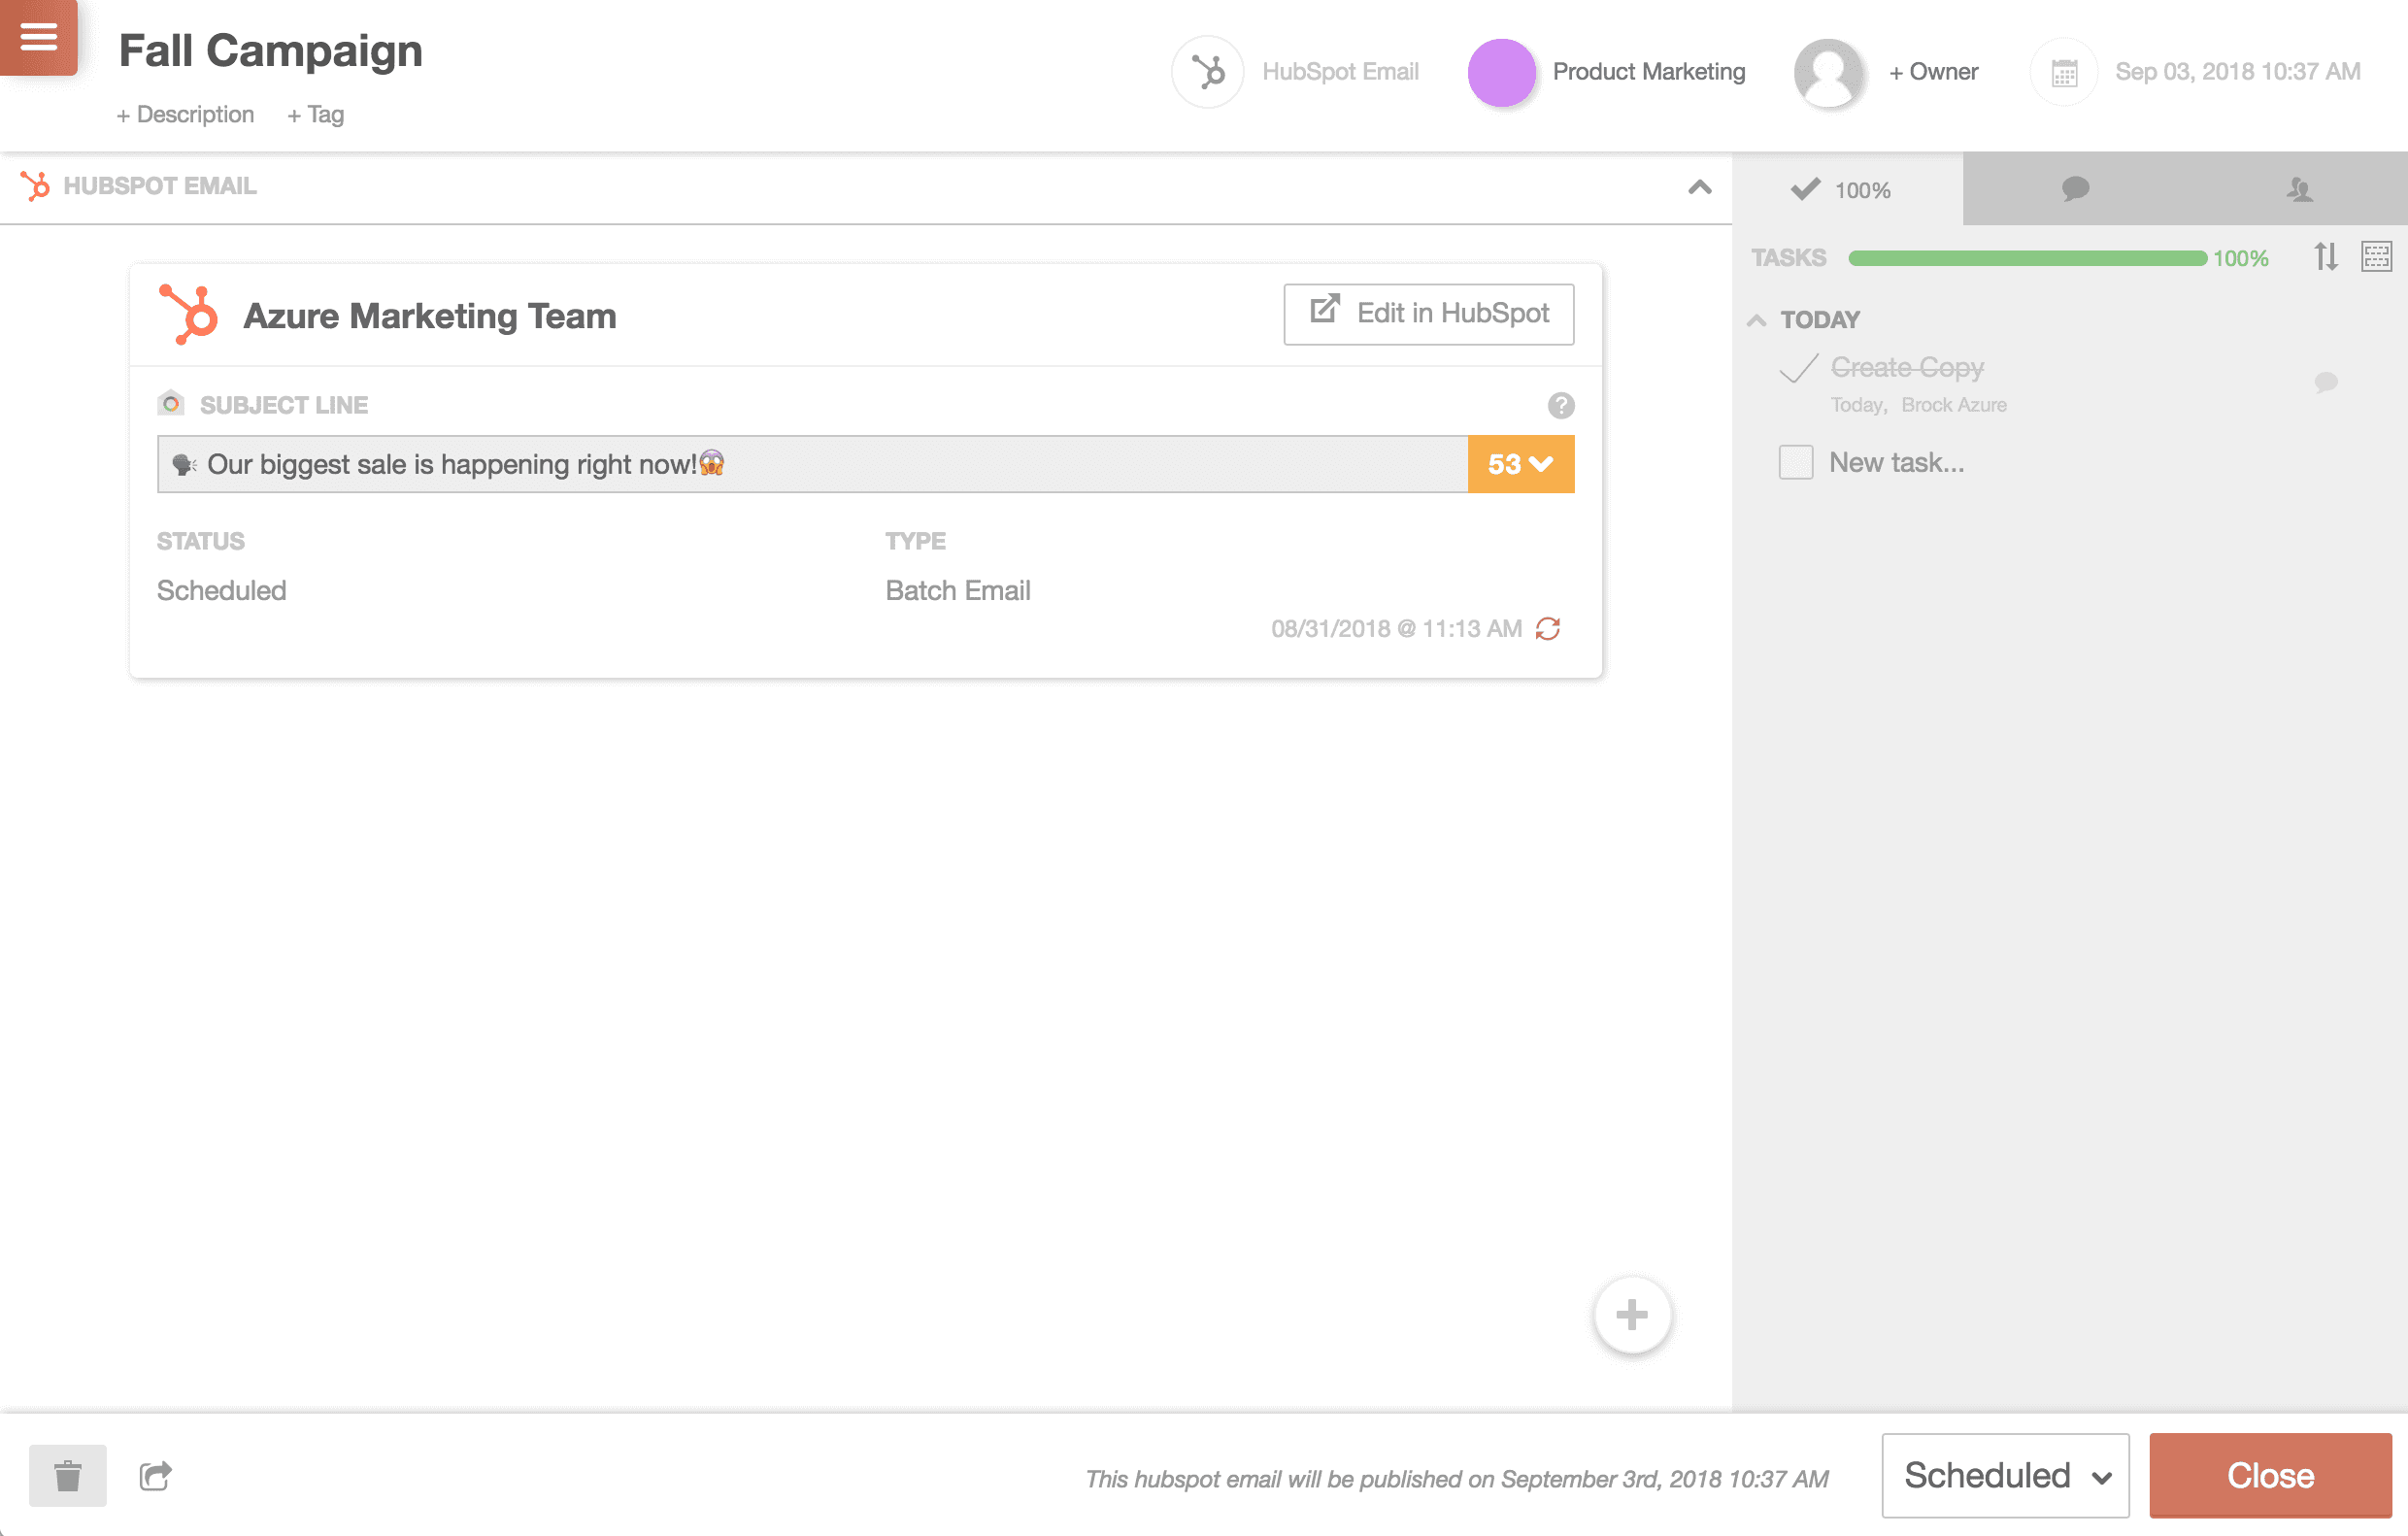
View Email Campaigns On Your Calendar
After you connect your HubSpot account to CoSchedule, all of your scheduled HubSpot email campaigns will be added to your calendar. To create a new HubSpot email campaign, go to HubSpot. When an email campaign is scheduled inside HubSpot, an Email Marketing project type will be created on your calendar with the synced information.- Project Title: Title of the email campaign in HubSpot.
- Scheduled Date: Scheduled time for the email campaign in HubSpot.
- Subject Line: Subject inside of the email campaign in HubSpot.
Note: HubSpot email campaign details are only editable inside of HubSpot. To edit the email campaign, click Edit in HubSpot.
Note: Maximize your email open rate with the Email Subject Line Tester.
Back To Top